Azure App Service is the fastest path from .NET code to a running production URL if you're already in the Microsoft ecosystem. It handles OS patching, runtime updates, TLS certificates, and load balancing — you just deploy your app.
Prerequisites
# Install Azure CLI
winget install Microsoft.AzureCLI

# Login
az loginRecent Azure CLI versions changed the login flow (I hit this on 2.88.0): az login now
lists every subscription your account can reach and prompts you to pick one right there,
instead of silently defaulting to one. So the az account set below is no longer part of
the first-login ritual — you only need it to switch subscriptions later.
# Set your subscription (if you have multiple and want to switch later)
az account set --subscription "My Subscription"
Creating an App Service from CLI
# 1. Create a resource group (logical container for related resources)
az group create \
  --name myapp-rg \
  --location eastus

# 2. Create an App Service Plan (defines the compute tier)
az appservice plan create \
  --name myapp-plan \
  --resource-group myapp-rg \
  --sku B1 \
  --is-linux

# 3. Create the web app targeting .NET 10
az webapp create \
  --name myapp-12345 \               # Must be globally unique
  --resource-group myapp-rg \
  --plan myapp-plan \
  --runtime "DOTNETCORE:10.0"

# Your app is now live at: https://myapp-12345.azurewebsites.net
One trap worth knowing: --runtime takes the colon form (DOTNETCORE:10.0), but the command that lists what your region offers prints the pipe form — don't compare them literally in a script:
# Prints e.g. DOTNETCORE|10.0 (supported until 2028-12-01), DOTNETCORE|8.0, ...
az webapp list-runtimes --os linux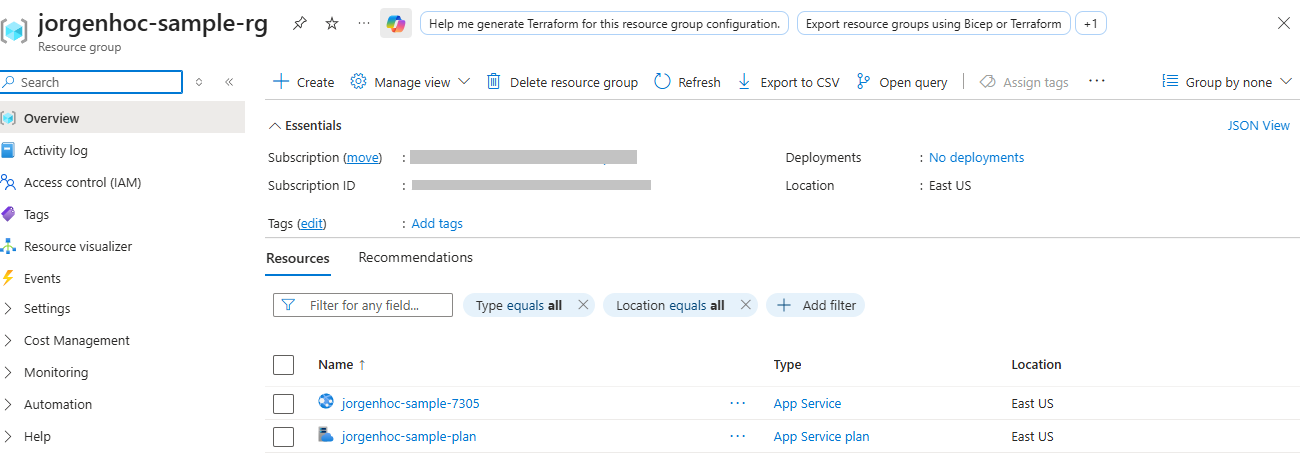
Pricing Tiers
The prices below are not quoted from memory — they come from Azure's public Retail Prices API (Linux, East US, pay-as-you-go, retrieved 2026-08-18; monthly ≈ hourly × 730):
| Tier | Hourly | ~Monthly | RAM | vCPU | Key Features |
|---|---|---|---|---|---|
| F1 Free | $0 | $0 | 1 GB | Shared | 60 CPU-min/day, no custom domain TLS |
| B1 Basic | $0.017 | ~$12 | 1.75 GB | 1 | Always On, custom domain TLS |
| B2 Basic | $0.034 | ~$25 | 3.5 GB | 2 | — |
| B3 Basic | $0.067 | ~$49 | 7 GB | 4 | — |
| S1 Standard | $0.095 | ~$69 | 1.75 GB | 1 | Deployment slots, autoscale |
| S2 Standard | $0.190 | ~$139 | 3.5 GB | 2 | — |
| P0v3 Premium | $0.0775 | ~$57 | 4 GB | 1 | Slots, autoscale, zone redundancy |
| P1v3 Premium | $0.155 | ~$113 | 8 GB | 2 | — |
| P2v3 Premium | $0.310 | ~$226 | 16 GB | 4 | — |
Reproduce it (or check your own region) with one request — no authentication needed:
curl -sG "https://prices.azure.com/api/retail/prices" \
--data-urlencode "\$filter=serviceName eq 'Azure App Service' and armRegionName eq 'eastus' and priceType eq 'Consumption'"For small production apps, B1 ($12/month) is excellent. But look closely before defaulting to Standard for deployment slots: **P0v3 ($57) is cheaper than S1 (~$69)** while offering more RAM, newer hardware, and everything Standard has. Price Premium v3 against Standard in your region before assuming Standard is the budget slot-capable tier.
Deploying Your Application
Method 1: ZIP Deploy (quickest)
# Build and publish
dotnet publish -c Release -o ./publish

# Create ZIP
cd ./publish && zip -r ../app.zip . && cd ..

# Deploy
az webapp deploy \
  --resource-group myapp-rg \
  --name myapp-12345 \
  --src-path app.zip \
  --type zip
This exact path — group, plan, app, app settings, zip deploy — is scripted end to end in
samples/azure-app-service-dotnet
(a minimal API whose response proves each configuration claim in this article). Two things measured while running it, so you can calibrate expectations:
- Total deploy time was ~2.5 minutes, and almost all of it was Kudu's "Starting the site" phase after the upload — the zip itself was accepted in about a second. Don't assume a hung deployment at the 90-second mark.
- Git Bash on Windows has no
zip— and don't reach forCompress-Archive. PowerShell'sCompress-Archivewrites backslash entry names, which Linux Kudu's rsync rejects (Invalid argument (22)) as soon as the publish output contains a subfolder; a flat output happens to survive, which is why this bug hides. Use Windows' built-in bsdtar instead:C:\Windows\System32\tar.exe -a -cf app.zip -C publish *produces a correct forward-slash zip.
Method 2: GitHub Actions (recommended for production)
First, download the publish profile from the portal or CLI:
az webapp deployment list-publishing-profiles \
  --resource-group myapp-rg \
  --name myapp-12345 \
  --xml > publish-profile.xml
Add the contents as a GitHub secret named AZURE_WEBAPP_PUBLISH_PROFILE, then:
# .github/workflows/deploy.yml
name: Deploy to Azure App Service

on:
  push:
    branches: [main]

jobs:
  build-and-deploy:
    runs-on: ubuntu-latest

    steps:
      - uses: actions/checkout@v4

      - name: Setup .NET 10
        uses: actions/setup-dotnet@v4
        with:
          dotnet-version: '10.0.x'

      - name: Restore dependencies
        run: dotnet restore

      - name: Build
        run: dotnet build --configuration Release --no-restore

      - name: Test
        run: dotnet test --no-build --verbosity normal

      - name: Publish
        run: dotnet publish -c Release -o ${{ github.workspace }}/publish

      - name: Deploy to Azure
        uses: azure/webapps-deploy@v3
        with:
          app-name: myapp-12345
          publish-profile: ${{ secrets.AZURE_WEBAPP_PUBLISH_PROFILE }}
          package: ${{ github.workspace }}/publish
Method 3: Azure CLI from GitHub Actions (OIDC auth — no secrets)
- name: Azure Login (OIDC)
  uses: azure/login@v2
  with:
    client-id: ${{ secrets.AZURE_CLIENT_ID }}
    tenant-id: ${{ secrets.AZURE_TENANT_ID }}
    subscription-id: ${{ secrets.AZURE_SUBSCRIPTION_ID }}

- name: Deploy
  run: |
    cd ./publish && zip -r ../app.zip . && cd ..
    az webapp deploy \
      --resource-group myapp-rg \
      --name myapp-12345 \
      --src-path ./app.zip \
      --type zip
Environment Variables and Configuration
Setting App Settings
App settings become environment variables in your app, overriding appsettings.json:
# Set individual values
az webapp config appsettings set \
  --resource-group myapp-rg \
  --name myapp-12345 \
  --settings \
    ASPNETCORE_ENVIRONMENT=Production \
    FeatureFlags__NewCheckout=true

# Set from a JSON file
az webapp config appsettings set \
  --resource-group myapp-rg \
  --name myapp-12345 \
  --settings @app-settings.json
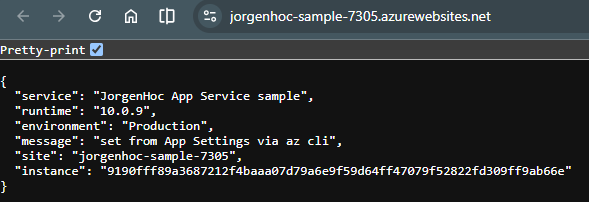
The double underscore (FeatureFlags__NewCheckout) maps to the : hierarchy separator of appsettings.json, and an App Setting wins over the same key in appsettings.json. The sample app deployed above demonstrates the precedence — its appsettings.json says "from appsettings.json", but the deployed response shows the value set via the CLI:
Connection Strings
Connection strings get special treatment — they're accessible via ConnectionStrings:Name in .NET configuration:
az webapp config connection-string set \
  --resource-group myapp-rg \
  --name myapp-12345 \
  --connection-string-type SQLAzure \
  --settings DefaultConnection="Server=myserver.database.windows.net;..."
// In your app, reads from Azure App Settings first, then appsettings.json
var connectionString = builder.Configuration.GetConnectionString("DefaultConnection");Using Key Vault for Secrets
Reference secrets from Key Vault without storing them in App Settings:
# Create Key Vault
az keyvault create --name myapp-kv --resource-group myapp-rg --location eastus

# Store a secret
az keyvault secret set --vault-name myapp-kv --name DbPassword --value "s3cr3t!"

# Enable system-assigned managed identity on the web app
az webapp identity assign --resource-group myapp-rg --name myapp-12345

# Get the principal ID
principalId=$(az webapp identity show --resource-group myapp-rg --name myapp-12345 --query principalId -o tsv)

# Grant the web app read access to Key Vault secrets
az keyvault set-policy --name myapp-kv --object-id $principalId --secret-permissions get list
Reference secrets in App Settings using Key Vault references:
az webapp config appsettings set \
  --resource-group myapp-rg \
  --name myapp-12345 \
  --settings "DbPassword=@Microsoft.KeyVault(VaultName=myapp-kv;SecretName=DbPassword)"
Deployment Slots
Deployment slots give you staging environments and zero-downtime swaps. Available on S1+ tiers.
# Create a staging slot
az webapp deployment slot create \
  --name myapp-12345 \
  --resource-group myapp-rg \
  --slot staging

# Deploy to staging (not production)
az webapp deploy \
  --resource-group myapp-rg \
  --name myapp-12345 \
  --slot staging \
  --src-path app.zip \
  --type zip

# Test staging at: https://myapp-12345-staging.azurewebsites.net

# Swap staging to production (near-zero downtime)
az webapp deployment slot swap \
  --resource-group myapp-rg \
  --name myapp-12345 \
  --slot staging \
  --target-slot production

# Roll back (swap again)
az webapp deployment slot swap \
  --resource-group myapp-rg \
  --name myapp-12345 \
  --slot staging \
--target-slot productionConfigure slot-specific settings (like connection strings) with the "slot setting" flag. These settings DON'T swap with the slot — the staging slot keeps its staging database connection after the swap.
# Mark a setting as slot-specific (won't swap)
az webapp config appsettings set \
  --resource-group myapp-rg \
  --name myapp-12345 \
  --slot staging \
  --slot-settings ConnectionStrings__DefaultConnection="staging-db-connection"
Scaling
Manual Scaling (Basic tier)
# Scale up (change VM size)
az appservice plan update \
  --name myapp-plan \
  --resource-group myapp-rg \
  --sku S2

# Scale out (add instances) — Basic tier only supports manual scale-out
az appservice plan update \
  --name myapp-plan \
  --resource-group myapp-rg \
  --number-of-workers 3
Auto-Scaling (Standard tier and above)
# Enable autoscale for the App Service Plan
az monitor autoscale create \
  --resource-group myapp-rg \
  --resource myapp-plan \
  --resource-type Microsoft.Web/serverFarms \
  --name myapp-autoscale \
  --min-count 1 \
  --max-count 5 \
  --count 1

# Add scale-out rule (add instance when CPU > 70%)
az monitor autoscale rule create \
  --resource-group myapp-rg \
  --autoscale-name myapp-autoscale \
  --condition "CpuPercentage > 70 avg 5m" \
  --scale out 1

# Add scale-in rule (remove instance when CPU < 30%)
az monitor autoscale rule create \
  --resource-group myapp-rg \
  --autoscale-name myapp-autoscale \
  --condition "CpuPercentage < 30 avg 10m" \
  --scale in 1
Configuring Always-On
By default, apps on the Basic tier and above spin down after 20 minutes of inactivity. Enable Always On:
az webapp config set \
  --resource-group myapp-rg \
  --name myapp-12345 \
--always-on trueAlways On is not available on the F1 Free tier. If you're on Free and experiencing cold starts, upgrade to at least B1.
Custom Domain and TLS
# Add a custom domain
az webapp config hostname add \
  --resource-group myapp-rg \
  --webapp-name myapp-12345 \
  --hostname www.yourdomain.com

# Create a managed TLS certificate (free)
az webapp config ssl create \
  --resource-group myapp-rg \
  --name myapp-12345 \
  --hostname www.yourdomain.com

# Bind the certificate
az webapp config ssl bind \
  --resource-group myapp-rg \
  --name myapp-12345 \
  --certificate-thumbprint <thumbprint-from-previous-command> \
  --ssl-type SNI
Monitoring with Application Insights
# Create Application Insights
az monitor app-insights component create \
  --app myapp-insights \
  --resource-group myapp-rg \
  --location eastus

# Get the instrumentation key
instrumentationKey=$(az monitor app-insights component show \
  --app myapp-insights \
  --resource-group myapp-rg \
  --query instrumentationKey -o tsv)

# Set on the web app
az webapp config appsettings set \
  --resource-group myapp-rg \
  --name myapp-12345 \
  --settings APPLICATIONINSIGHTS_CONNECTION_STRING="InstrumentationKey=$instrumentationKey"
Add the NuGet package to your app:
dotnet add package Microsoft.ApplicationInsights.AspNetCore// Program.cs
builder.Services.AddApplicationInsightsTelemetry();Useful CLI Reference
# View app logs in real-time
az webapp log tail --resource-group myapp-rg --name myapp-12345

# Show current app settings
az webapp config appsettings list --resource-group myapp-rg --name myapp-12345

# Restart the app
az webapp restart --resource-group myapp-rg --name myapp-12345

# Get the app's URL
az webapp show --resource-group myapp-rg --name myapp-12345 --query defaultHostName -o tsv

# Show all running apps in a resource group
az webapp list --resource-group myapp-rg --query "[].{Name:name, State:state, URL:defaultHostName}" -o table
Where to Go From Here
App Service is the path of least resistance for a .NET app that already builds and runs, because the platform handles the runtime for you. If you would rather own the runtime — to pin a specific .NET version, add native dependencies, or keep deployment portable between providers — package the app yourself with a .NET Dockerfile instead.
If you have not settled on a provider yet, the .NET hosting comparison puts App Service next to Railway, Fly.io, and Render on plan tiers and trade-offs.